For long exposures (of which I’ll take to mean over 1 minute in length for any length telescope), setting up your mount correctly – before you even place a telescope on it – is vital. Heck, even battling against a Go-To is made easier if you setup your mount correctly in the first place. And it does not have to be onerous task, I promise.
Whilst a number of varying other factors come into play, particularly if you ask questions on forums and seasoned vets wade in with nuances and details – which can overwhelm a beginner – just ignore them for now. The goal is for you to have a routine where you can get out and enjoy your telescope for imaging night after night (clouds forgiving!).
We are not discussing complexities of auto-guiding here. The goal is being able to have something that allows you to begin your journey, have consistent Go-To setup routines and getting a 1-minute, maybe 2-minute exposure without star trails at this stage. When I was first setting out with this hobby, I called that a huge win.
The Polemaster? But I’m a beginner! Ok, look – I hate polar aligning. There is nothing worse than spending a precious evening getting frustrated wondering if the polar alignment was actually aligned OK after being convinced you did everything right. You get no bonus points for telling people at your local astronomy club that you manually align. Add the extra £280 / $365 to your setup fees if you want a stress free life. Sure there are other ways, such as SharpCap Pro’s polar aligning. I’ve done both. SharpCap’s routine saves you £270 (it’s part of the pro version at £10 a year), but Polemaster works consistently, without the need for me to set up any of my scopes and cameras first – SCP polar aligning makes me do things out of order. If SharpCap Pro works for you – brilliant. This is not a post about the merits of one versus the other. I would not discourage you from a process that works for you.
What You Need
- Tripod + Equatorial (EQ) Mount
- Compass
- Spirit Level (optional if in-built)
- QHYCCD Polemaster
- Clear view of Polaris*
* I live in the Northern Hemisphere so my instructions are for us Northerners. Adjust for those in the upside-down!
What You Don’t Need
- Telescope (do not put your telescope on at this stage)
- A degree in astrophysics
- Clouds
How To Do It
1. Placement and rough alignment
Things don’t happen all fully automagically. There are some elements that require you to think for yourself! This bit can be done during the day though.
- First, pick your spot where you’ll be going back to night after night if you don’t have the luxury of something more permanent. You’ll need to have an idea of what you can and cannot see from that location. And you’ll need to be able to see Polaris. There are some astro-ninjas on here that seem to navigate using in-built magnets, but for the rest of us – do not make life hard for yourself and make sure you will be able to spot and see Polaris. Use something like Stellarium on your phone for a rough guide of where it is in the sky.
- Get yourself a compass and stand out in your garden and rotate yourself until you are pointing North. The North Celestial Pole (NCP) that you really will be aligning to is irrelevant at this stage – it’s slightly off to the right from North. If this is the daytime, make sure you can see high above, in front of you – quite a bit above the roofs or trees – that’s where Polaris will be.

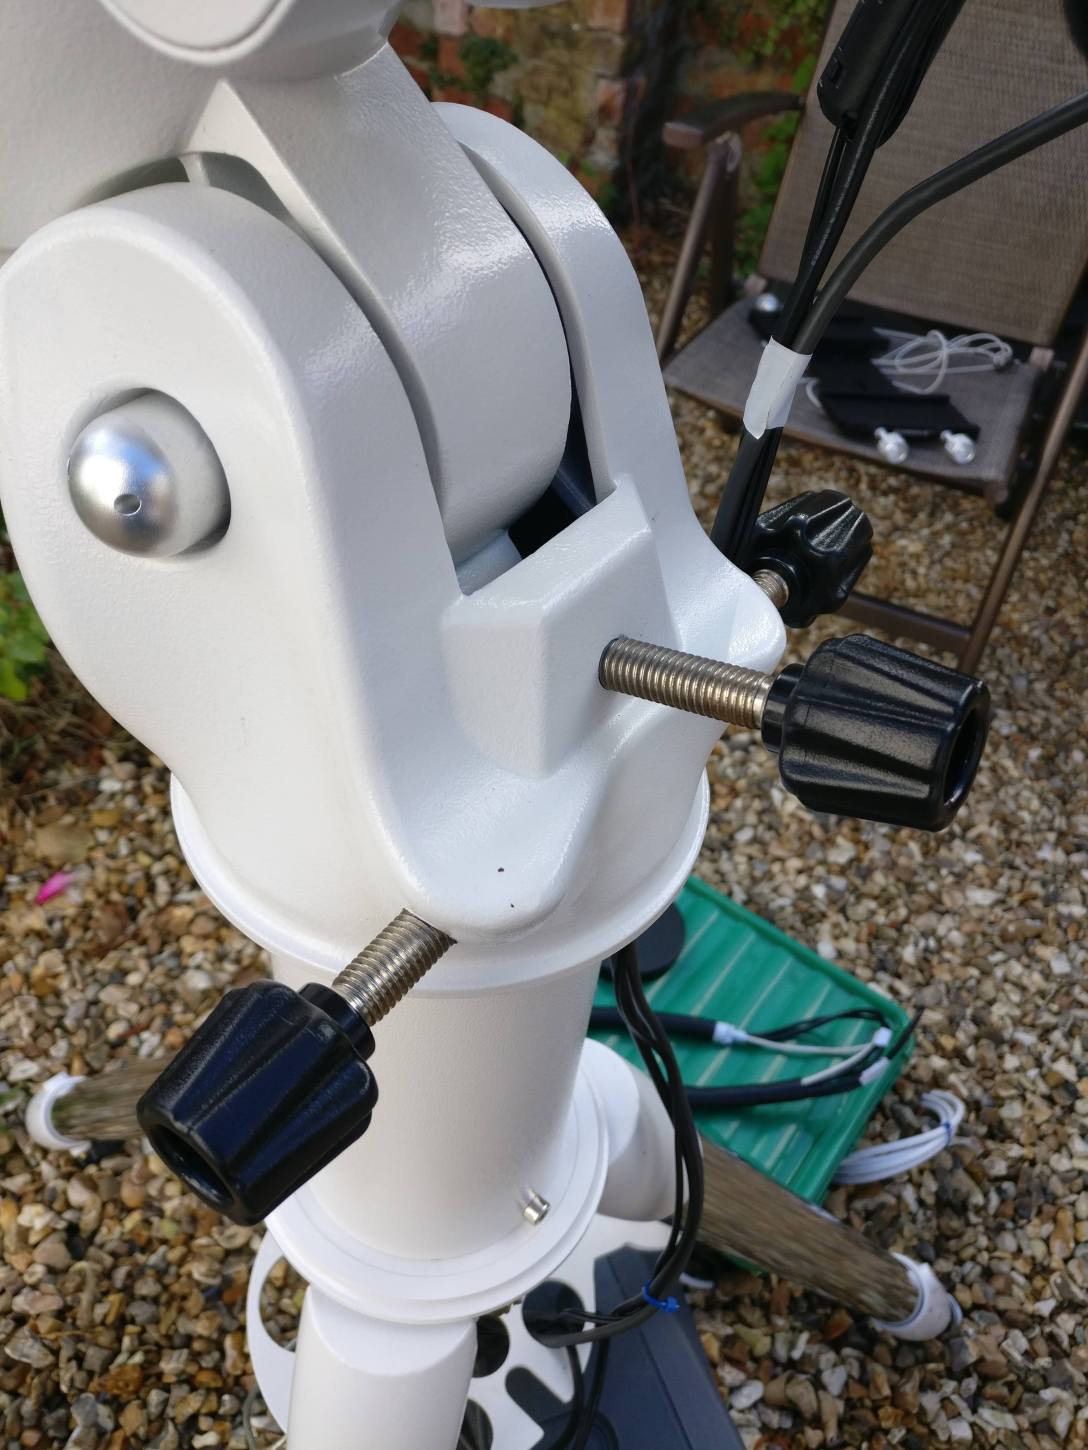
- Now rotate your mount so that the mount itself is pointing North too. This generally means the weights/weight shaft are the things in direction of North (providing your mount is at the start position if you loosened the clutch and let the weights swing down – this will be your home position. The mount puck is pointing South and up, the weights and bar will be pointing down and North). Some mounts have a handy N on the front leg to help with this part. The EQ5 legs have an N on the front leg, that should point North. The EQ6 legs as shown below, for example, has that leg pointing South instead.

- There, you’re done for this bit. This is your spot for your tripod and mount. We’re not completely finished, but we’re not adjusting anything to get any precise settings at this point either.
2. Levelling
I read questions about whether or not the mount should be level or not. What is strange, I reckon that they spend more time writing out that question and waiting for an answer than actually just bothering to level the mount. Just level it!

Some mounts have a little spirit level in-built. I find that more than adequate. Else get a spirit level onto the tripod and just make sure it is level. It’s a simple as that. Adjust the legs until you’re happy.
3. Wait until its dark
Astrophotography (and astronomy) is not for the impatient. This is the hardest part – waiting to try something out. If you’re in the UK, I reckon you have a 1 in 365 chance of it being a cloud-free day. But you’ve got this far and technically you only need the patch of sky around Polaris to be cloud-free to do the next bit.
4. Polar Alignment using a QHYCCD Polemaster
Note these steps are specifically for the Northern Hemisphere and Polaris. Adjust as necessary for you Southerners!
Honestly, life’s too short. I know seasoned veterans can polar align with their eyes closed during the daytime, but this is about how to enable beginners quickly in the field of astrophotography – and if one of these gems of equipment is a Polemaster, then so be it.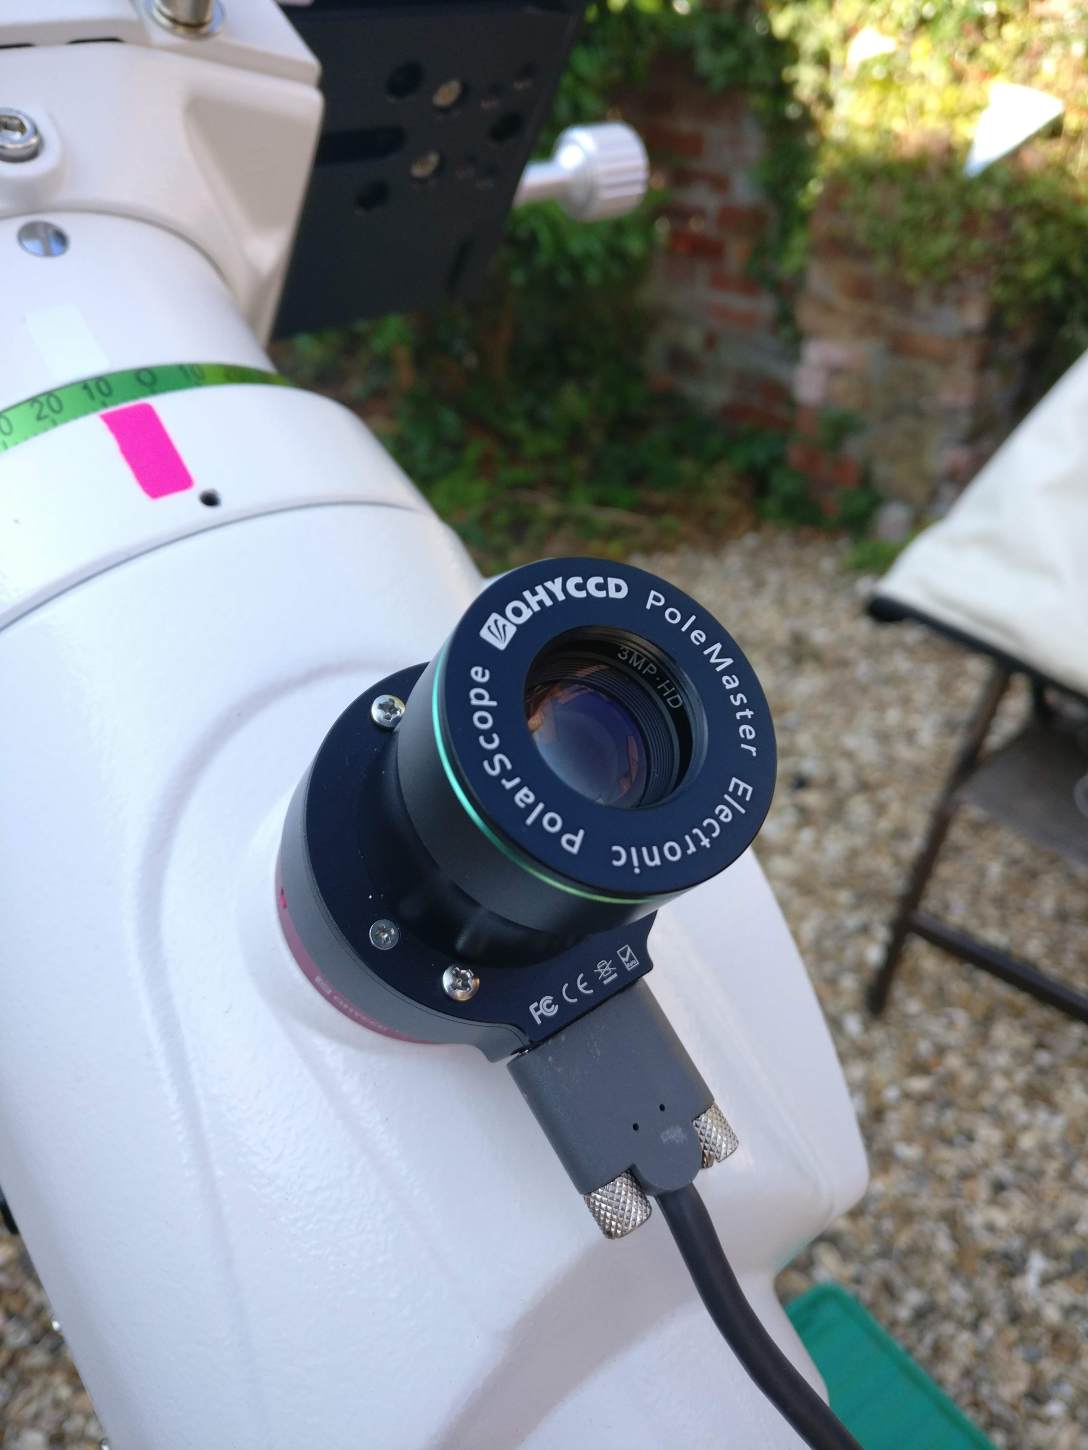
What the Polemaster does is be that polar aligning ninja for you and your mount. It walks you through the adjustments of the alt-azimuth bolts of your mount so that the mount then points to the North Celestial Pole courtesy of knowing where Polaris is. You only use it during this phase of your astrophotography outing – before you set your scope up. Once you’ve aligned your mount, you can technically turn off that software – it doesn’t do any magic adjustments during your guiding, or do any participation of auto-guiding. I think that’s a perception people have with the Polemaster. It does one job: it helps you with the fine adjustments for getting accurate polar aligning.
At a high-level – these are the steps:
- Get Polaris and surrounding stars in view
- Align the template to match Polaris and surrounding stars
- Perform an RA (Right Ascension) rotation exercise (basically rotates the camera around Polaris)
- Compare to the template again to see if anything has moved so it has an idea of where things are placed
- You then use the live-view to adjust the alt-azimuth bolts on your mount to align Polaris over a target
- Then finally fine tune using a closer view
Here’s the process:
- You’ve added your Polemaster to the front of your mount, you’ve connected it to your laptop and you’ve downloaded the software. Fire it up and you get a blank screen.
- Click on connect and you get to adjust the gain and exposure time depending on your light pollution levels etc. For me, the lowest settings are fine.
- It asks you to identify where Polaris is by double-clicking on it.
- It then asks you to rotate the template around Polaris to line up the surrounding stars.
- You then acknowledge it’s lined up. Once done it asks you to do a rotation of your mount. What you’re doing here is identifying and selecting one of the surrounding stars and watch that rotate around the arc – which is the RA rotation – the rotation that your scope will be doing when following the night sky. So choose a star and keep an eye on it while you’re rotating. Rotate it about (at least) ~25 degrees West. You click on it when you’ve finished rotating.
- You then repeat the process – keep an eye on the same star and rotate it a further ~25 degrees. And then you select that again when you’re done.
- Now you send your scope back home again (to the starting position – weights bar pointing North and down. The star you have identified should track along the green circle back to it’s original position and it will ask you if that is the case. You’ll go back to step 3 if it is not correct.
- If all is OK it will ask you to identify Polaris again and now you get to adjust your mounts alt-az bolts (the bolts that will rotate the mount around its latitude and longitude). You’re centering Polaris over a cross-hair at this point. So do this then double-click on Polaris once it is done again.
- Now you do any rotation of the template again, usually this shouldn’t have moved at all, but ensure that you haven’t been so long doing the previous stages that things have moved. Then you do the fine-tuning through the “monitor”.
- The monitor is the last stage – you move the green cross-hair over the red target in the monitor view by adjusting the same alt-az bolts on your mount as shown above. These are small adjustments and your aim is to get it spot on. Once it is spot on, you can choose to close down the Polemaster software and forget you have a Polemaster attached, or you can leave it running to periodically check and adjust during the night.
Congratulations! You’re polar aligned ready for a night of fun under the stars.
What We Did
Setting up your mount should not be the frustrating part of this hobby and I know, from experience, that I found it a laborious process. But now, setting up my scopes for astrophotography is a quick and painless process. It is essentially broken down into 3 steps – all done before you place your scope onto the mount:
- Rough placement of the tripod and mount
- Levelling
- Polar aligning using a Polemaster
Some of these steps can be short-cut a little. If you’re able to leave your tripod and/or mount outside using something like a TeleGizmos 365 cover, then the only thing you need to do is a quick check of polar alignment using the Polemaster. If you are unable to leave your mount outside, mark the spot where your tripod legs go, so you can add your mount and then jump straight to levelling and then polar aligning.
With the above tried and tested steps, you’ll be able to get out and imaging in next to no time.
The picture below shows my mount ready for my telescopes. It shows a Starwave dual losmandy side-by-side mount by Altair. This is my home position (when I tell my mount to park). This means my telescopes will be pointing towards the region in the sky where Polaris is. Please note it does not mean that when I place my scopes on here and I look through them that they are precisely pointing at Polaris. That is not what home is here – but a consistent starting position – more so that my mount and software knows where it begins in the sky to know where it is when it slews to a new target.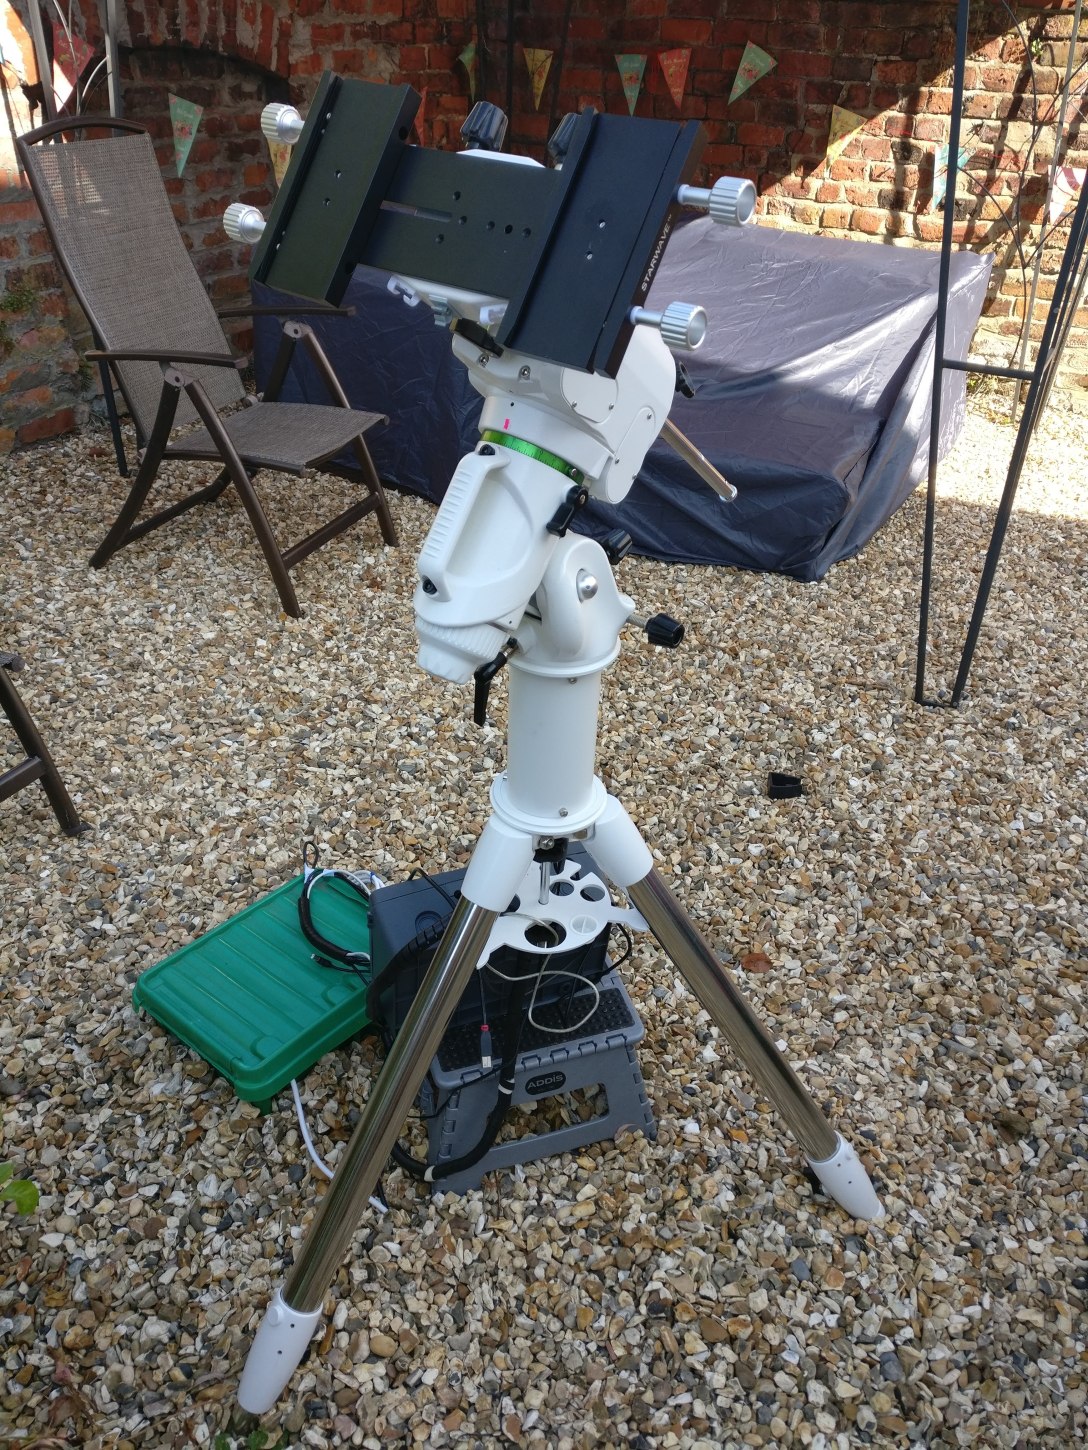

Hi
Do you use the Polemaster on your EQM35 Pro, if so what adapter did you use.
LikeLike
The adapter says its for AVX (and looking at the Celestron AVX it is sensible). I contacted Rother Valley Optics and they said it was either the HEQ5 one or the EQ6 one… and this was the one that they sent and fits.
LikeLike